Nesting in Rhino (the OpenNest command)
OpenNest also runs as a Rhino command — no Grasshopper needed. Type OpenNest on the command line,
select your sheets, select your parts, and it nests them on a background thread (Rhino stays responsive) and
bakes the result into layers, carrying each part's markings and Rhino object data along.
It installs with the same package as the Grasshopper components (Rhino Package Manager → search OpenNest),
on both Windows and macOS — one install delivers the Grasshopper components and the OpenNest command.
Files to download:
- ⬇ OpenNest_Rhino.3dm — the example model used below.
How it classifies your selection
You make one mixed selection of parts and markup; OpenNest sorts it out automatically by geometry type and spatial containment — the same logic the Grasshopper Geometry components use:
| You draw… | …it becomes |
|---|---|
| A planar surface (or Brep / NURBS surface / SubD / extrusion) standing on its own | a part — its outer loop is the border, its trimmed inner loops are holes (kept empty) |
| A closed curve standing on its own | a part (no holes) |
| Any closed boundary inside a part (surface / brep / subd / closed curve) | an attribute — kept verbatim and moved with its part |
| Any other geometry inside a part — text, open curves, hatches, points, dots | an attribute — moved with its part |
So holes come only from trimmed surfaces (exactly like sheets), and anything sitting inside a part — a logo outline, an engraving, a label, a drilled feature — rides along as an attribute instead of being nested on its own.
Step by step
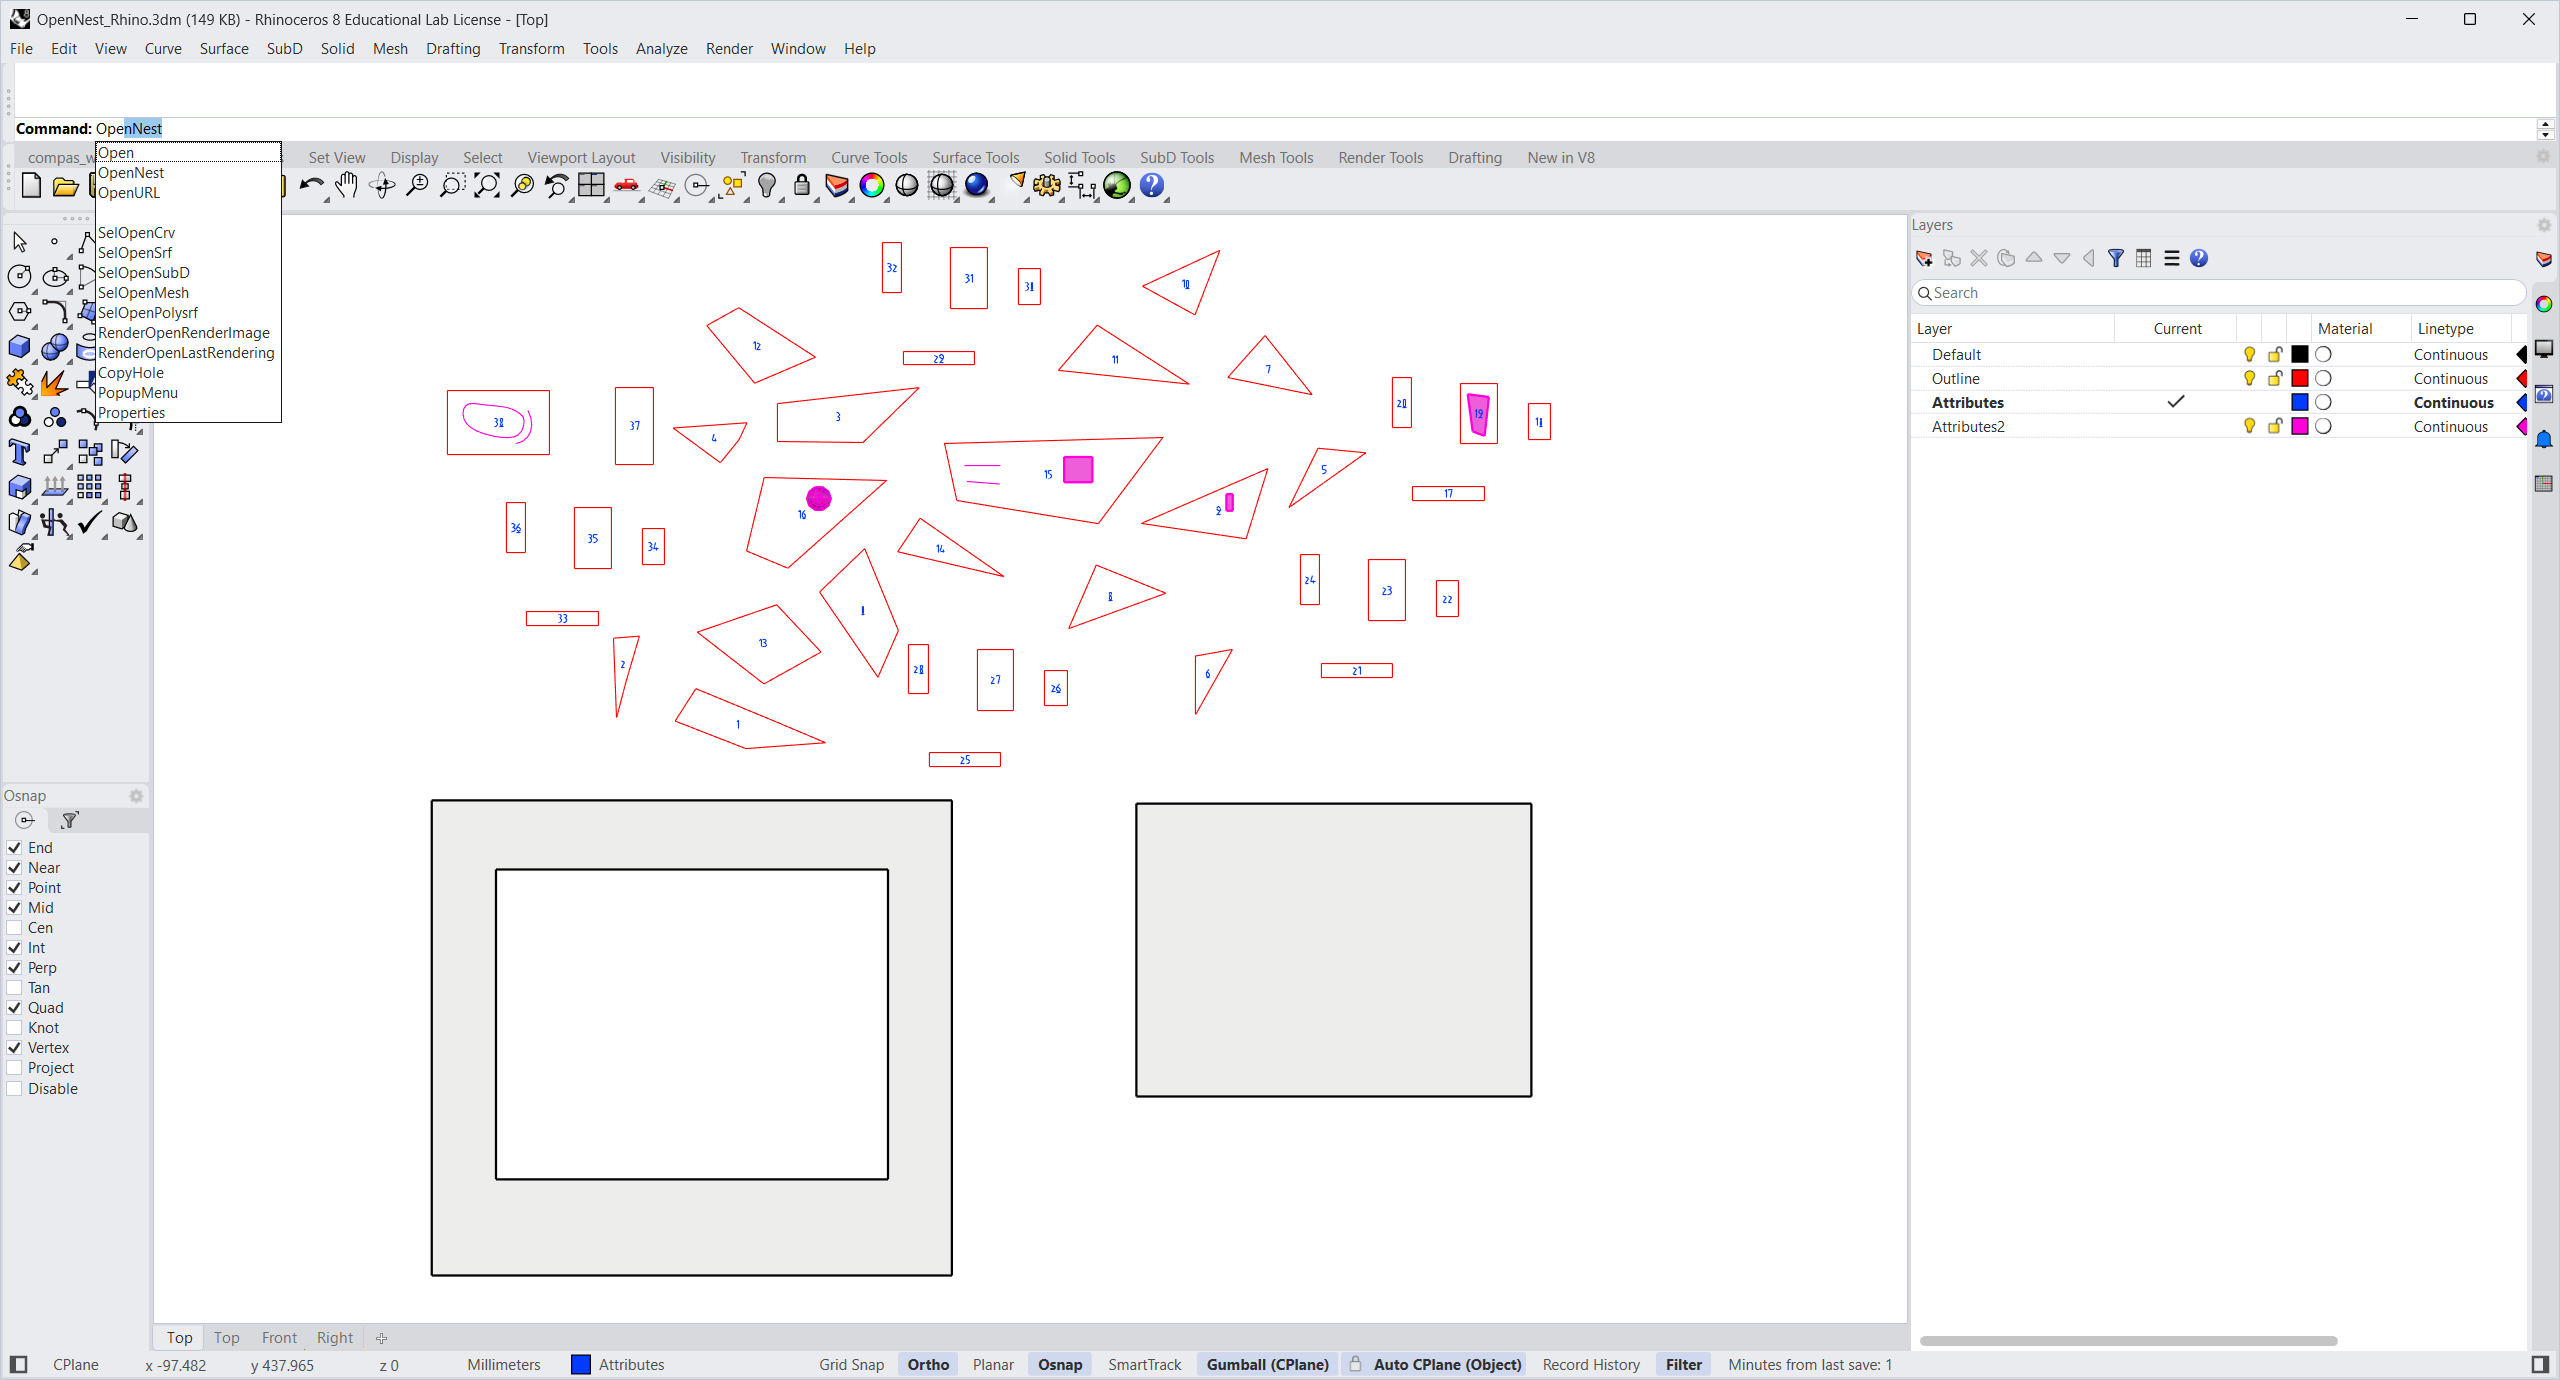
1 · Prepare the model
Lay out your parts (closed polylines or planar surfaces) with their markings on their own layers
(here: Outline, Attributes, Attributes2), and place your sheet surfaces below. Type OpenNest.
2 · Select the sheets
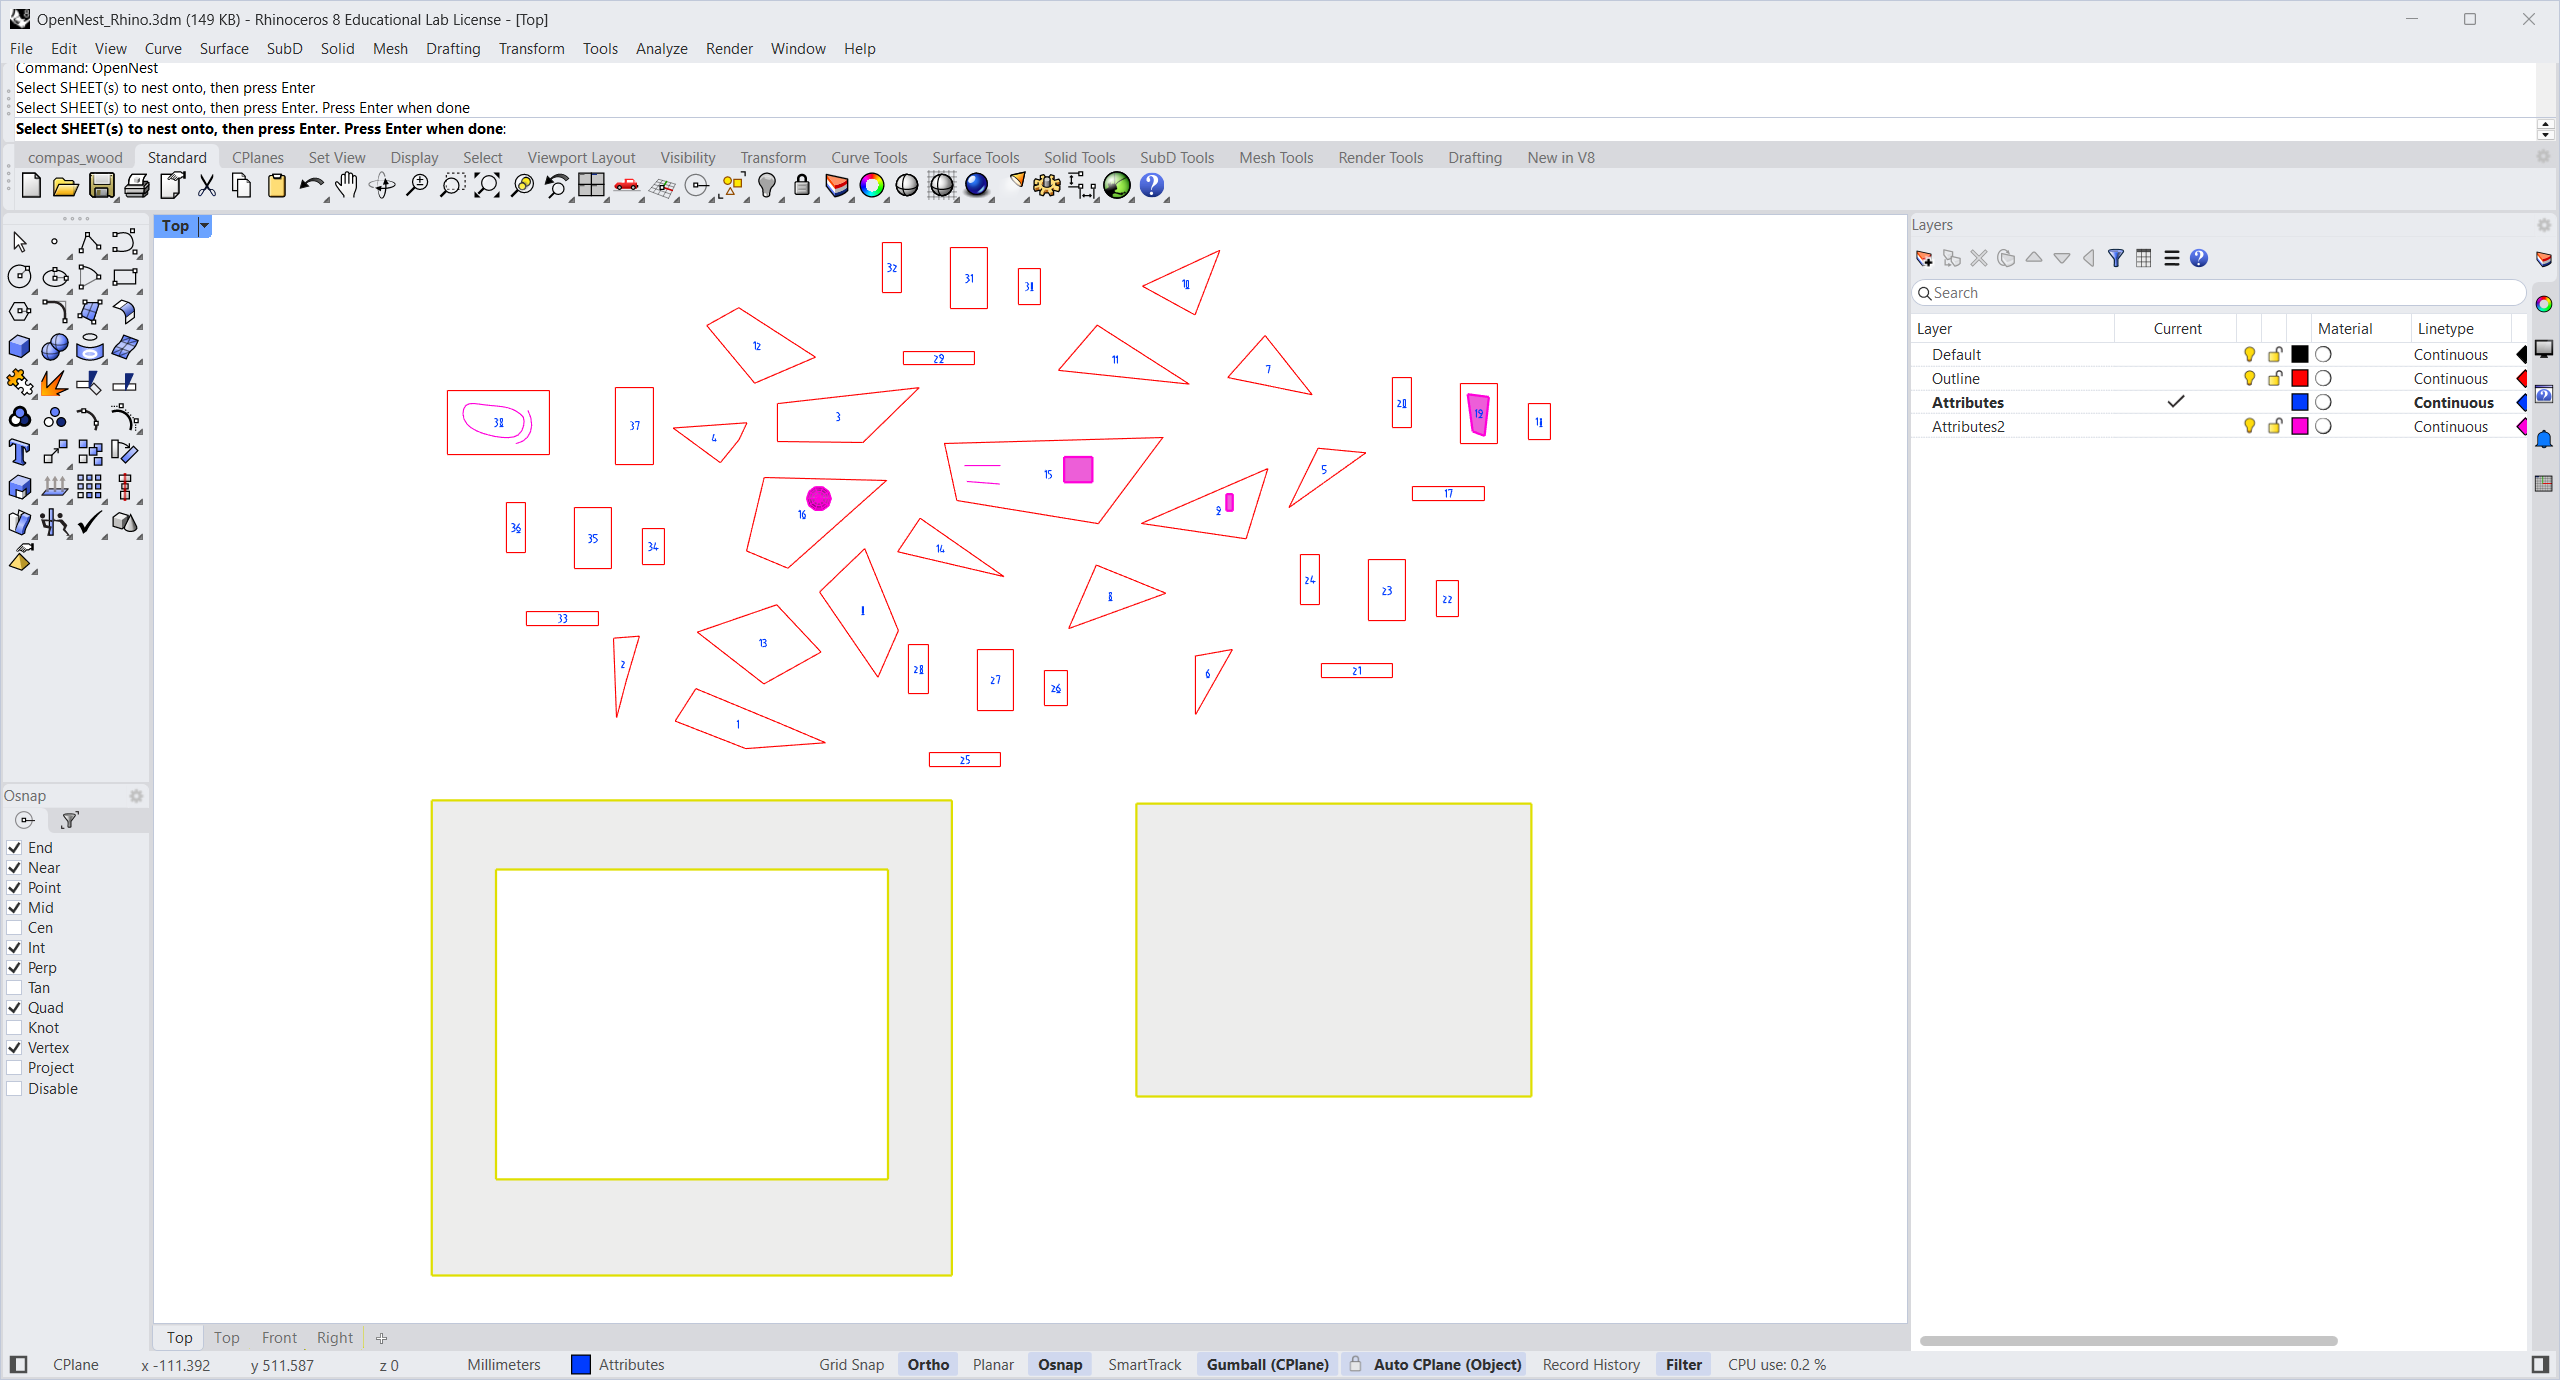
At “Select SHEET(s) to nest onto”, pick the sheet surface(s) and press Enter. A surface's trimmed holes become keep‑out regions automatically.
3 · Select the parts and set options
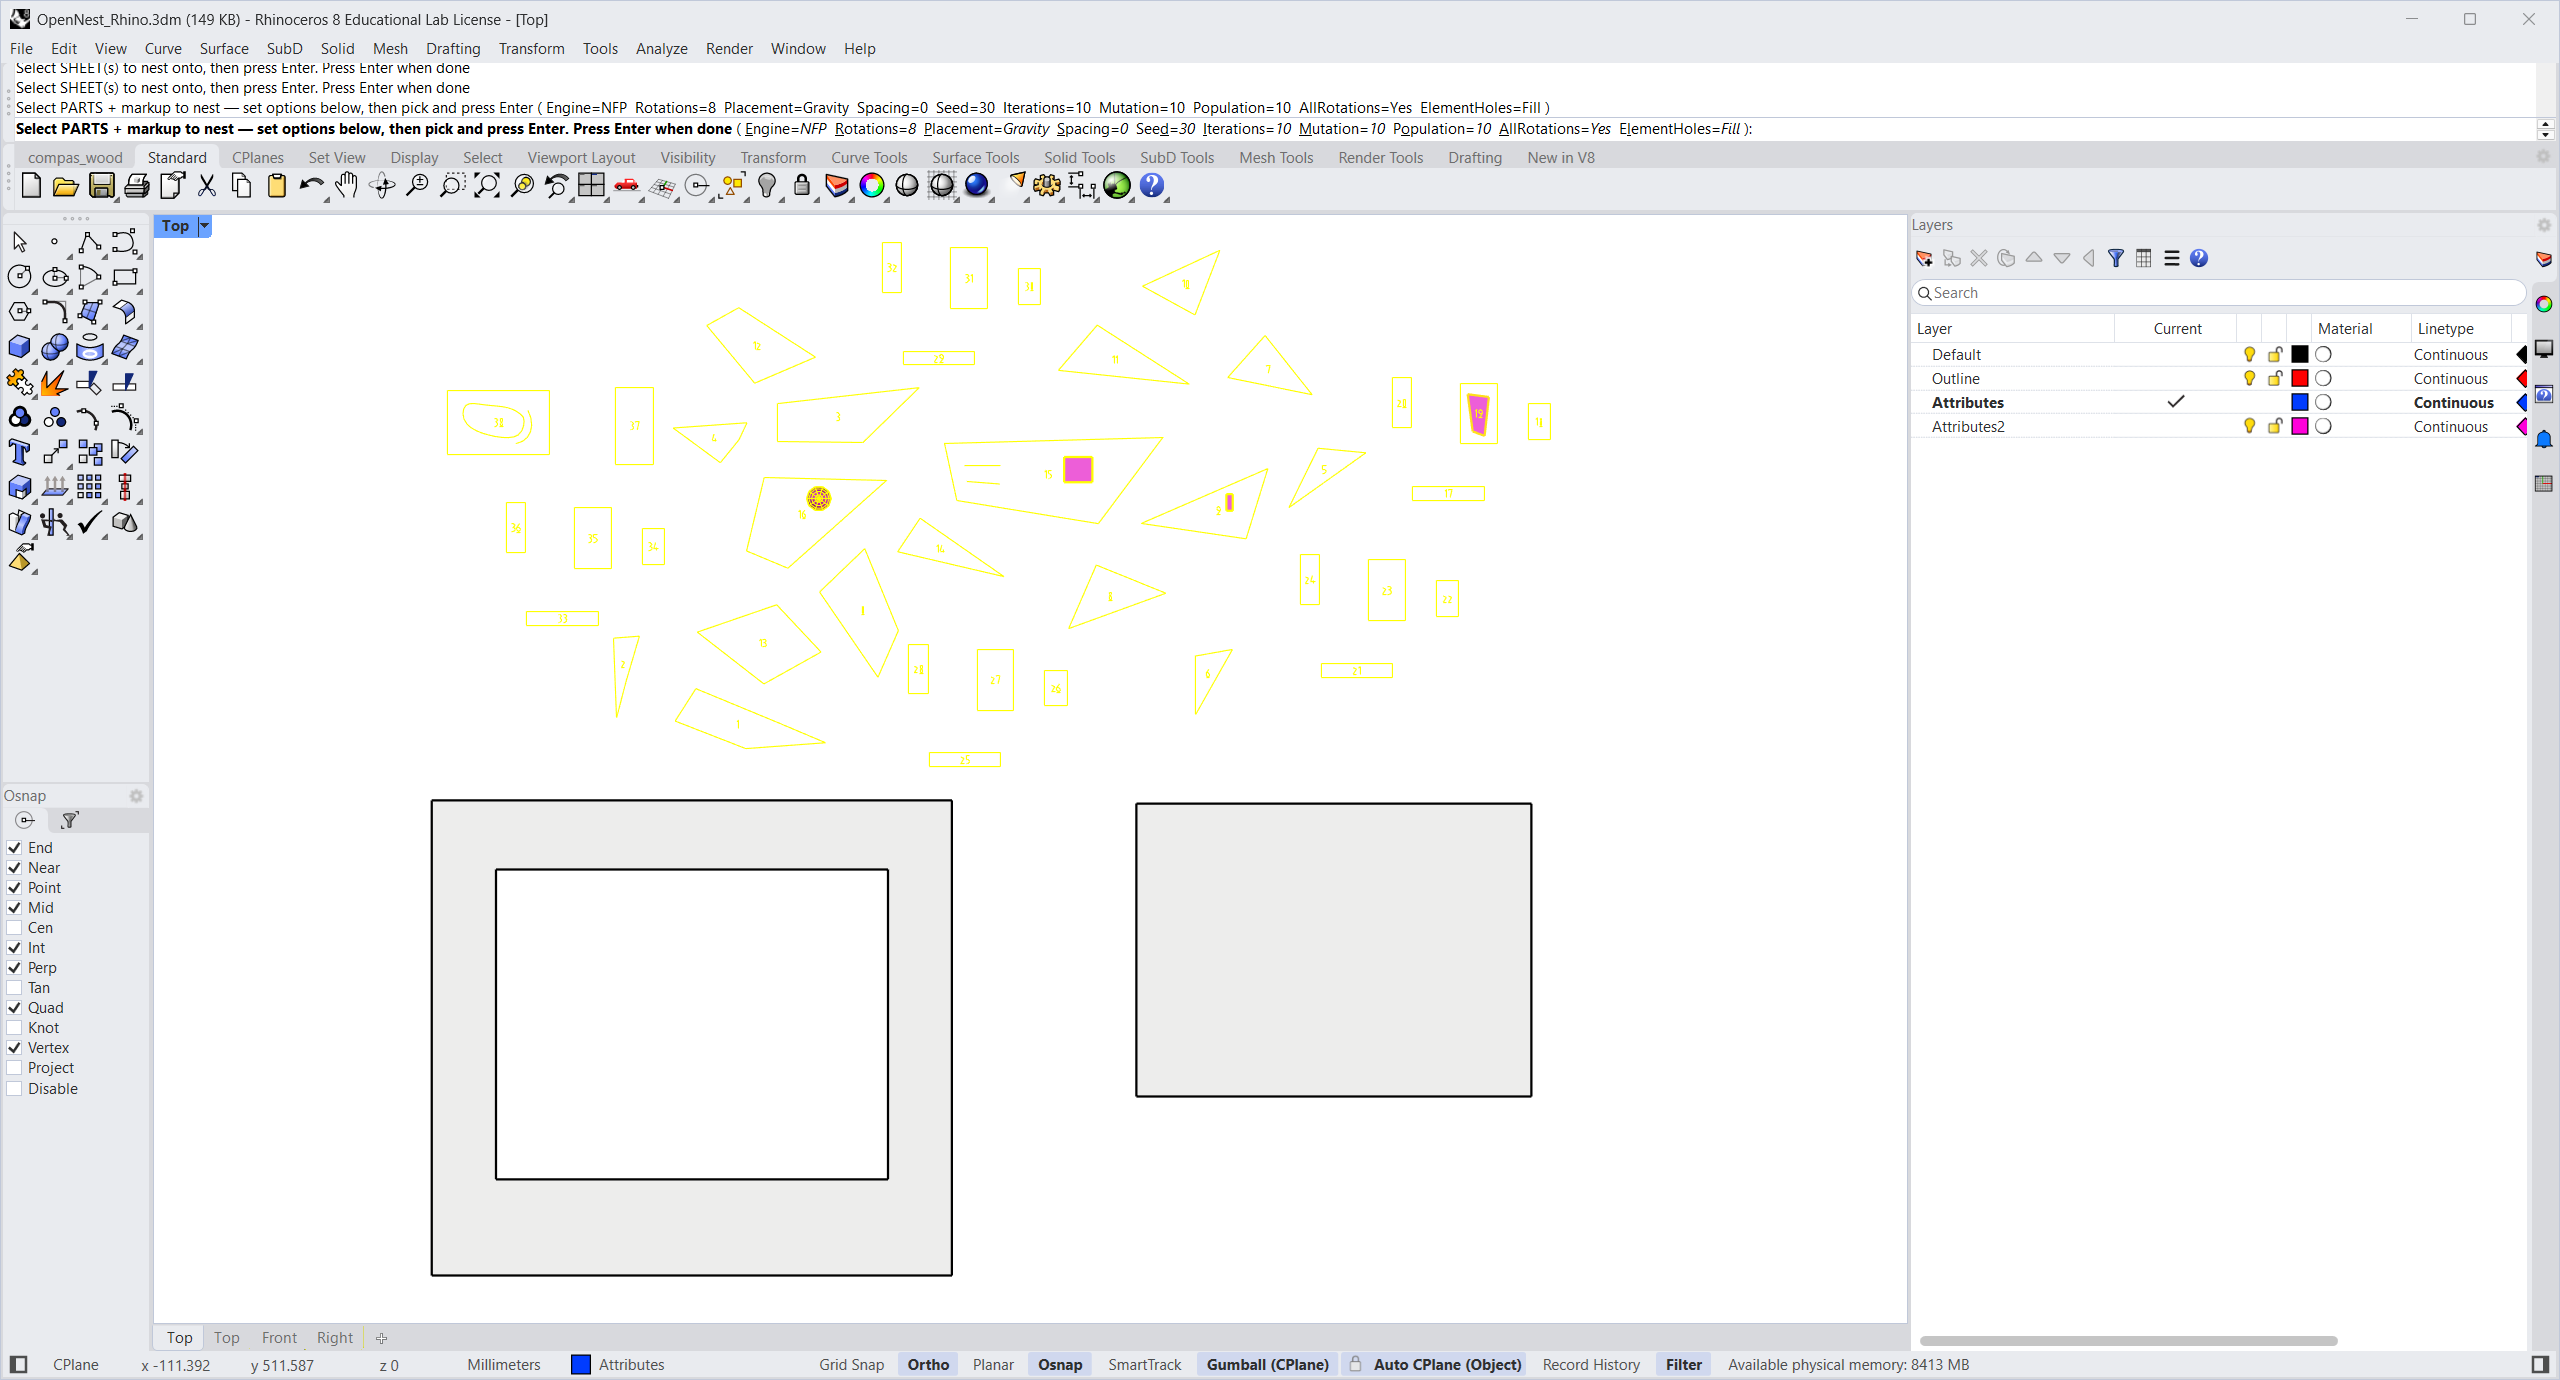
At “Select PARTS — markup … set options below”, click the command‑line options to configure the nest,
then pick everything (parts and their markup) and press Enter. Click Engine to switch between
NFP and Collision — the option list changes to that engine's settings.
4 · Read the result
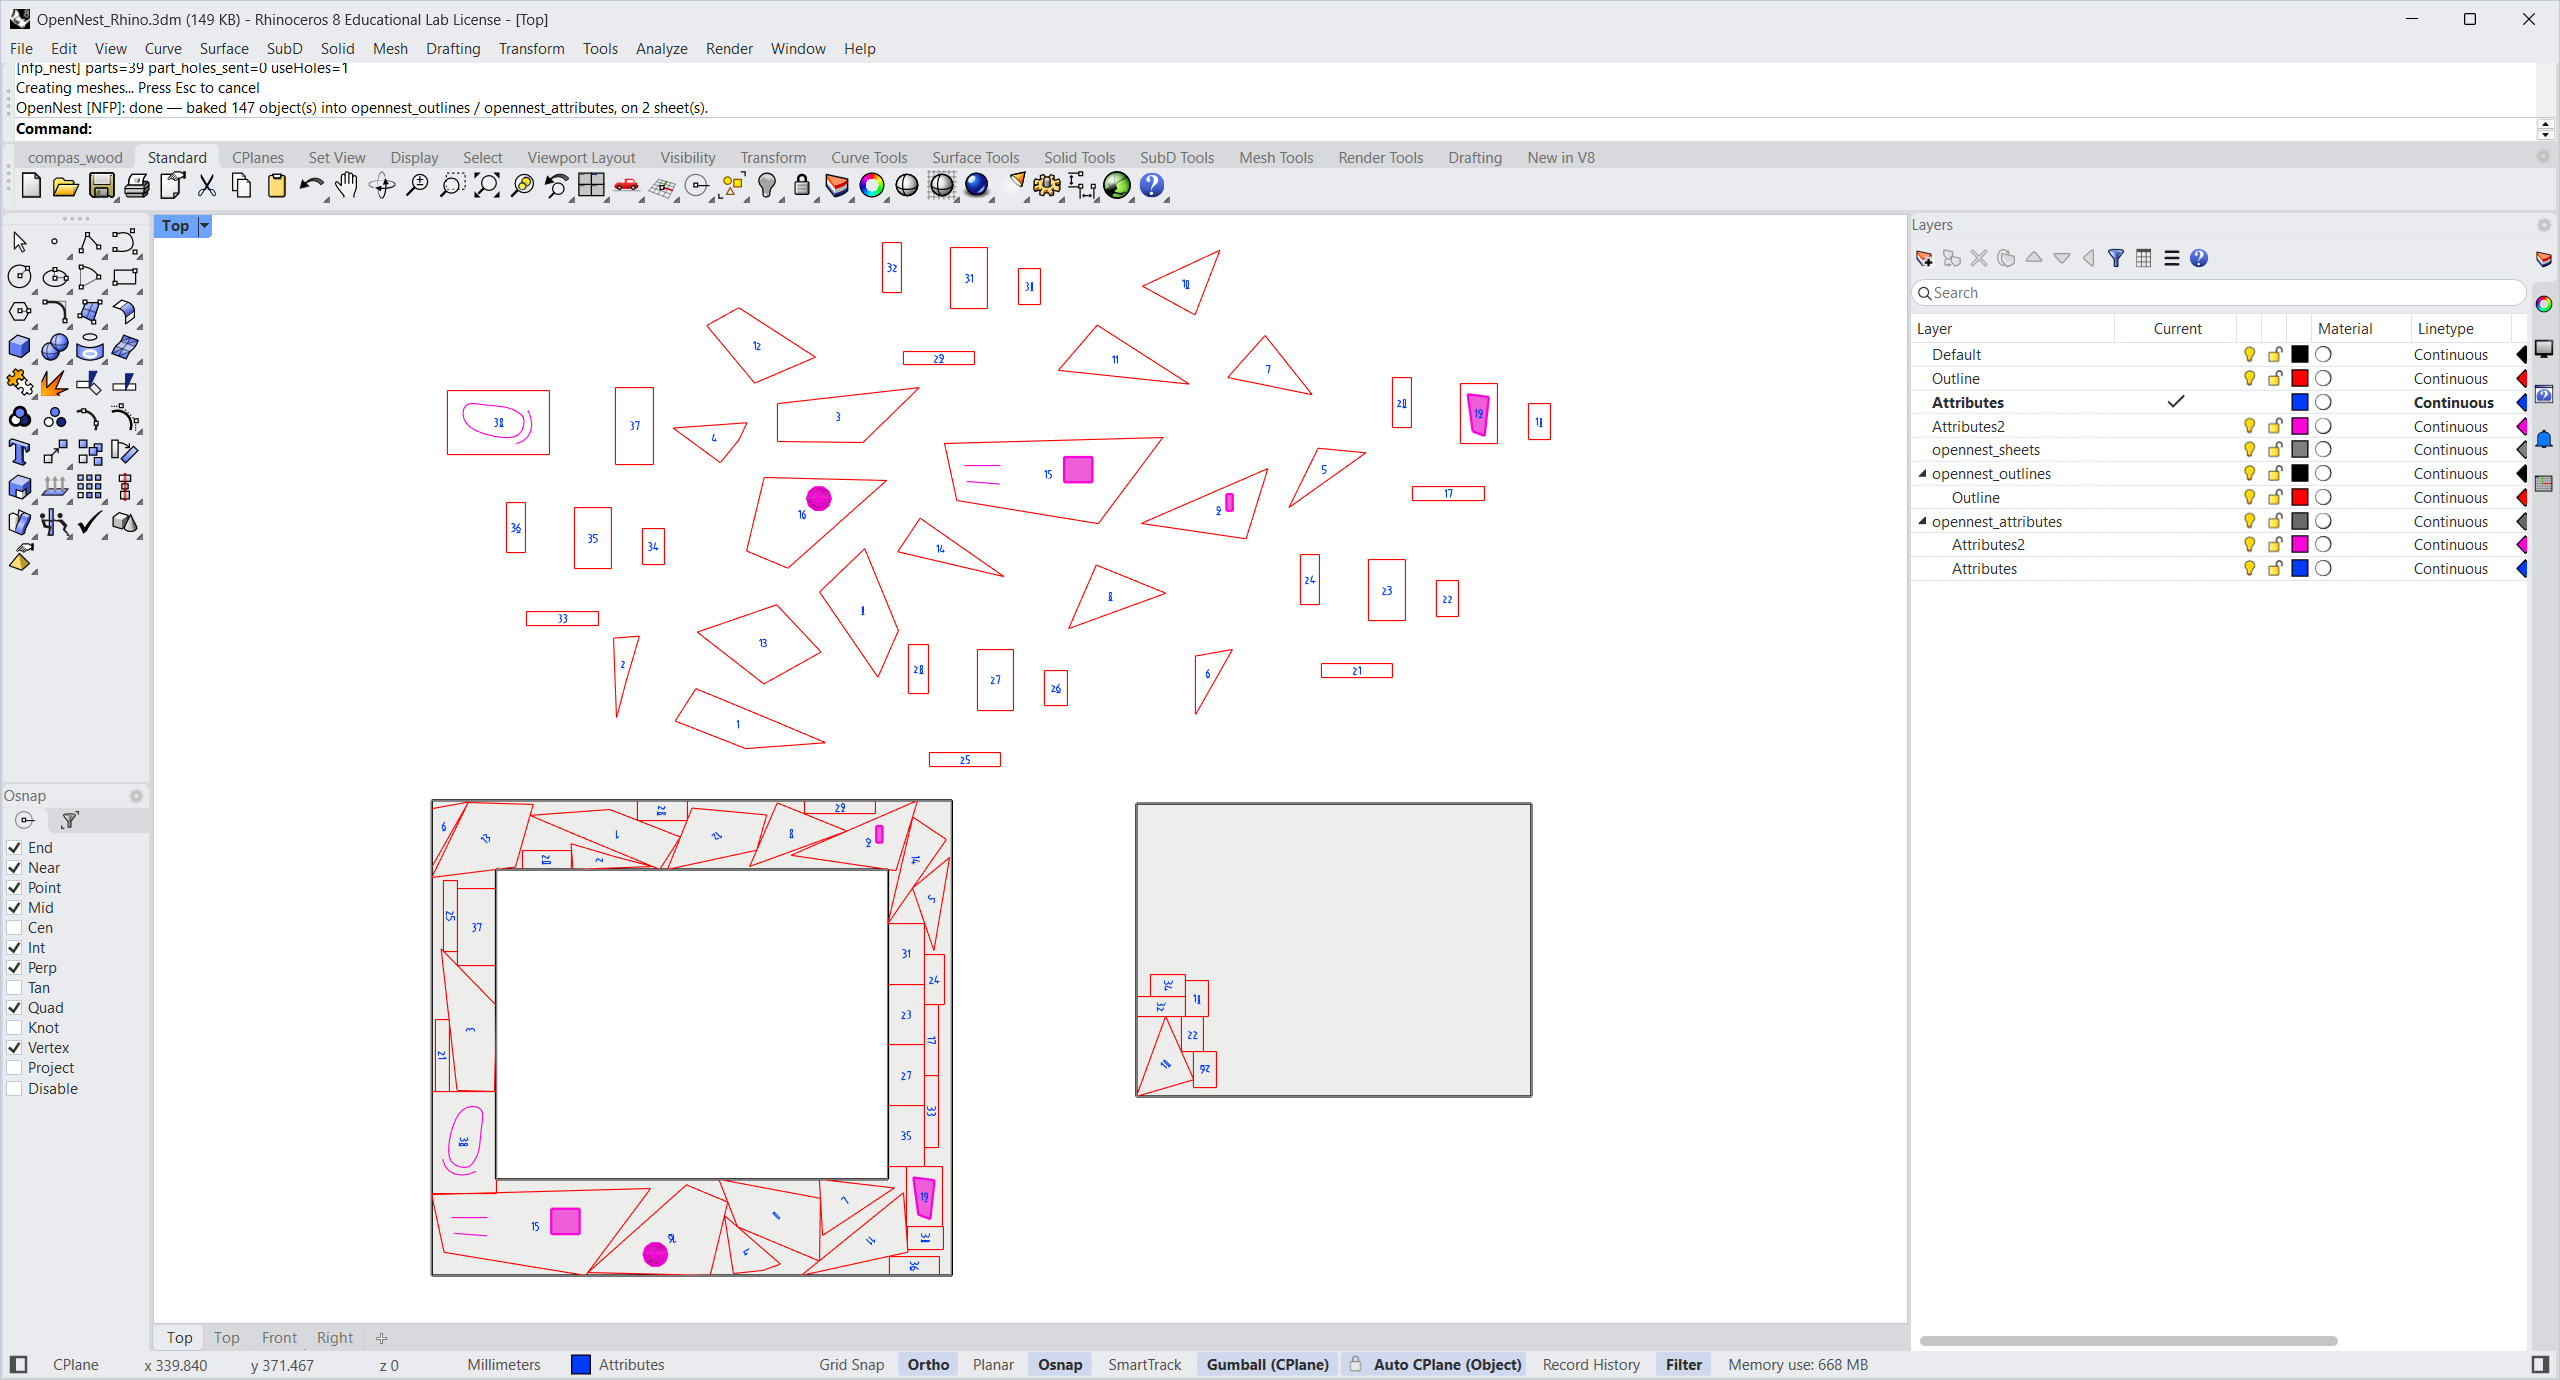
It solves on a background thread (the prompt shows live gen X / Y progress) and bakes into three layers,
with a sublayer per source layer (name and colour copied) so your layer structure and by‑layer colours
are preserved. If the parts don't fit, extra sheet copies are added to the right automatically.
Output layers
| Layer | Contents |
|---|---|
opennest_sheets |
the frame of each used sheet |
opennest_outlines |
placed part borders (+ holes), under a sublayer per source layer |
opennest_attributes |
placed markings (text, curves, breps…), each keeping its own colour / material / name, under a sublayer per source layer |
Each placed part instance (outline + its attributes) is also put into its own group, so you can move a nested part as a unit.
Parameters
Pick the engine first; the options below switch to match it. Values are sticky for the Rhino session.
Engine = NFP (no‑fit‑polygon + genetic algorithm)
| Option | Default | Description |
|---|---|---|
| Rotations | 8 | Orientation angles each part may try (360/n). More = tighter, slower. |
| Placement | Gravity | Strategy: Box · Gravity · Squeeze · BottomLeft. |
| Spacing | 0 | Gap kept between placed parts (model units). |
| Seed | 30 | Random seed (same seed = same result). |
| Iterations | 10 | GA generations to evolve — the result tightens each generation. |
| Mutation | 10 | GA mutation rate. |
| Population | 10 | GA population size. |
| AllRotations | Yes | Try every orientation per placement for the tightest pack (capped at 8). |
| ElementHoles | Fill | Nest smaller parts into larger parts' holes (Off / Fill). |
Engine = Collision (penetration‑depth physics relaxation)
| Option | Default | Description |
|---|---|---|
| Rotations | 3600 | Orientation angles each part may try; more = tighter, slower. |
| Seed | 100 | Random seed; change it if a run spills to a second sheet. |
| Starts | 1 | Multi‑start: run this many seeds and keep the densest. |
| Iterations | 4000 | Relaxation rounds; higher packs tighter but is slower. |
| Poles | 48 | Inscribed circles per part for collision tests; more = cleaner pack, slower. |
| ElementHoles | Fill | Nest small parts into larger parts' holes (Off / Fill / FillFirst). |
| Compact | BottomLeft | Post‑pack tightening slide (Off / BottomLeft / Multi). |
| Fit | OneSheet | OneSheet = fill a single sheet (overflow placed outside); AllParts = use as many sheets as needed. |
Which engine?
NFP packs with exact no‑fit‑polygon math — best for clean, non‑overlapping layouts of polygonal parts. Collision uses an inscribed‑circle (Poles) surrogate that relaxes overlaps — great for dense packing, but very sharp corners can need more Poles. For guaranteed no‑overlap on spiky shapes, use NFP.
Notes
- The boundary is taken exactly as drawn (no simplification), so placed parts never overlap their neighbours.
- The solve runs on a background thread and keeps Rhino responsive (you can orbit/zoom while it works); the command line shows live progress.
- Results are baked as real Rhino geometry (not a live preview), wrapped in a single Undo — so one
Undoremoves the whole nest.